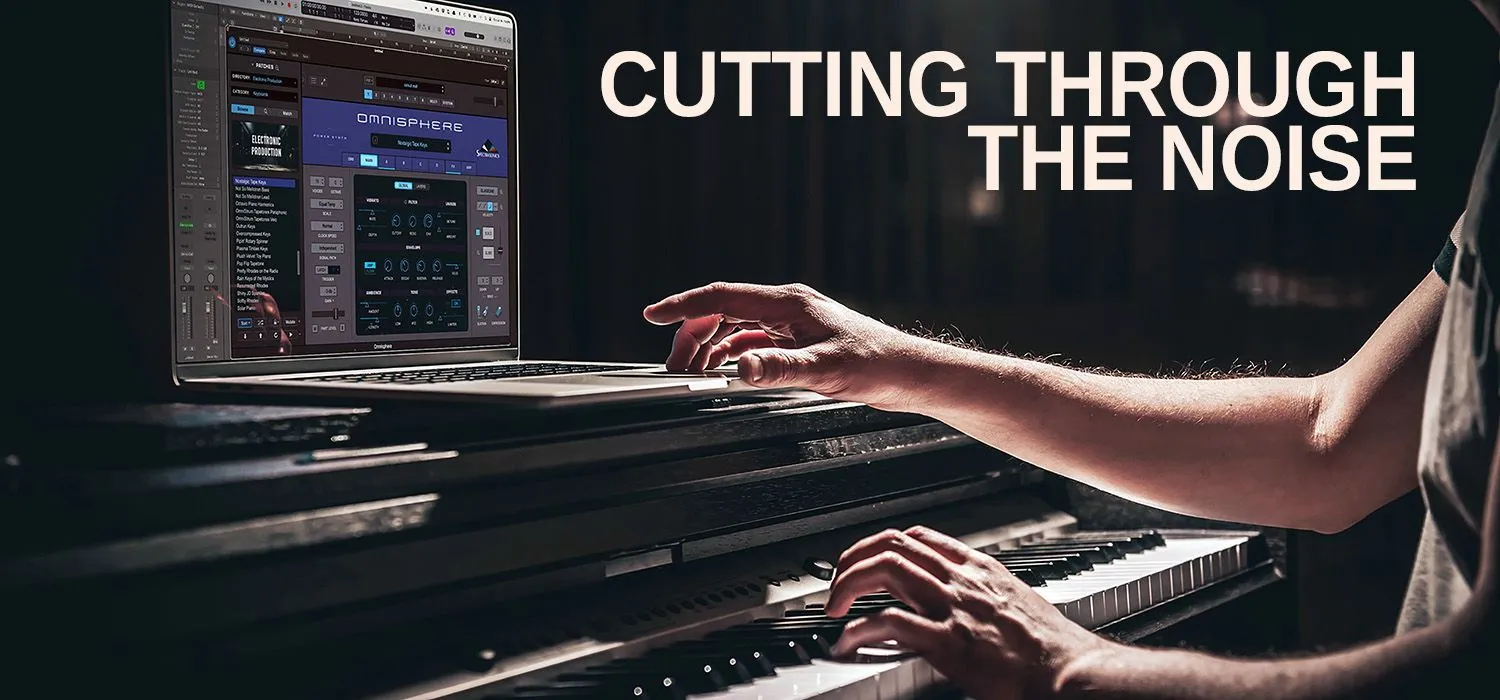
“Ya Got Sixty Seconds, Make ‘em Count!”
Tips from an Ad-Composer on Breathing Life into Ad-Music
By Max Schad
The “Squeeze”
Sixty seconds is a deceitful amount of time. Watch a hyped-up release for a new iPhone and it can feel like a passing breeze. Listen to the “real-actor” testimonials of a pharmaceutical ad and it can feel like an eternity. Now, working on the former will certainly come with its own set of obstacles -- hitting distinct scoring points, matching the energy of what’s on screen, staying out of the way of an overzealous sound designer. Work on that second ad, however, and you may find yourself skimming through libraries and presets, desperately searching for a way to inject energy, trying your best not to loop your way through the scary “side effects”.
In my experience, unless you’re specifically asked to simply create a simple “music bed”, it’s important to consider how best to utilize these sixty seconds to create a piece of music that tells a story. Close your eyes and play back your track -- Does it have an arc? Can you tell when the product first arrives? Can you tell where the crescendo is?
It’s important to remember that your clients are most likely not interested in the recipe, they just want the brownie.
More often than not, a client will come to you with two invaluable things. The first, keywords. It’s important to remember that your clients are most likely not interested in the recipe, they just want the brownie. Note the keywords they might use to describe the energy they’re looking for -- handcrafted, fresh, unexpected, exciting -- don’t brush these off as platitudes. So much of the world of advertising lives in a language of contradiction -- “it should feel like x but not too much like x.” “We want to hear what it sounds like if we reference y but it shouldn’t use the same set of instruments as y”.-- Get out your musician-translate app and note how these vagaries and contradictions can guide you. Connect trigger-words to chord choices. Heck, I’ve even created presets in Omnisphere that I would imagine an instrument simply called “The Handcrafted” might sound like. The words can feel abstract, but take them seriously and take the time to inject them with musical purpose.
The next tool that a client will likely give you is a reference. Now, how to approach taking inspiration from a reference track is an entirely separate topic, but what’s important for the “Squeeze” approach is considering how best to represent that reference track in such a condensed period of time. Consider laying out your session and your arrangement in a way that denotes three acts. The ad won’t always call for a “problem, resolution/product, big finish”, but it’s helpful to structure your musical thinking that way. For example, I was once approached by a client whose reference was simply “the opening bass & kick from Bad Guy”. Well, loop this approach for thirty seconds and you may find yourself reaching for the remote. Instead, go for the “squeeze” approach. Build a sonic palette that you feel best represents the idea of the reference track. Next, assess the energy level of the reference and see how you can best match (or better yet, if requested, top it) and squeeze the arc of that energy in a way that tells a sixty-second story. The goal here is not only to recreate the feeling of a track the client already knows and loves, but to distill what makes that track great into a shorter time frame in a way that feels wholly original. Here are some additional steps that will hopefully help make this idea seem less abstract...
Stay in Your Lane/Knowing Your Place
Keep your melodies short and memorable. Melody lines that require 2-4 bars of payoff tend to make a listener (or in this case your client) feel like the music is too “busy” or is calling too much attention to itself. In the case of the example provided here, the focal-point melody really only exists to weave together the story. It starts with a classical piano, but is handed off to a variety of orchestral instruments throughout the piece. Rather, it’s the harmony and arrangement that gives the track a feeling of forward motion.
Take care not to fight with the voice over, particularly if the narration is speaking directly to the benefits of the brand. I find that utilizing a solid bus compressor throughout the writing process can help tamp down any overzealous creative flourishes that an overly excitable composer like myself can cling to without enough regard for the story. Remember that oftentimes, music is the last piece of the puzzle. Sometimes, the client may have gone weeks without the time to think through what the music bed may sound like and may be scared off at first listen if your music is poking too heavily through their ad.
About nine times out of ten, I’m recording a simple chord via an instrument track, printing that recording to audio, and then reversing a piece of the audio to swell into the next chord.
Plug the Leaks (Transition Trickery)
When an edit changes and suddenly a chunk of the picture is removed (and not in a way that matches your bpm), don’t panic! There are plenty of ways to patch-up those newly created bars of five-eight, even down to the 16th! I recommend reaching for the “Transition Effects” or “Textures Playable” section of Omnisphere after locating the “Keyscape Creative” section.

A collapsed view of the transition/playable effect patches I used in this particular track. Note how the majority of them are reversed. I’m constantly using Omnisphere to “plug the leak”. You can hear what this transition effect sounds like in Example Swell #2 or in the full demo at around :28.
Ready the “reverse” button! Sometimes it can help to write yourself markers that simply denote things like “cymbal swell, swish, swirl, reverse piano” -- things you might typically think of as “ear candy” on a typical pop production can serve you well when trying to cover up some difficult spots. I keep an organized folder on my desktop simply labeled “Transition FX”. Inside are subfolders labeled: breath fx, claps, cym swell, human foley, magic, rattles, reverse tones, sweeps and whooshes. I reach for this folder at least once during every ad that I work on. Of course, the line between tasteful and obvious is thin, but including these small tricks can help elevate key visual moments or even help “plug the leak” when a shift in the track or edit requires that sort of move.
In this particular instance, a bar of 5/4 smack-dab in the middle of the track has the potential to distract the listener, but utilizing just a few Keyscape Creative patches helped to weave together that moment at :28. For these transitions, I also like to reach for the “ARP” button in Omnisphere. I find the presets provided, particularly the Legacy V1 presets, can be key in helping me find a transition effect that feels ownable. In this particular example, I reached for “Sforzando by Velocity”. After locking that Arp preset, I skimmed through a few “Textures Playable” before and found a few presets that matched the vibe and energy I was looking for. Musically speaking, I use it against quite a few V-chords that are building back to I. About nine times out of ten, I’m recording a simple chord via an instrument track, printing that recording to audio, and then reversing a piece of the audio to swell into the next chord. Using a simple large hall or chamber reverb can help the reverse effect feel less obvious or harsh.
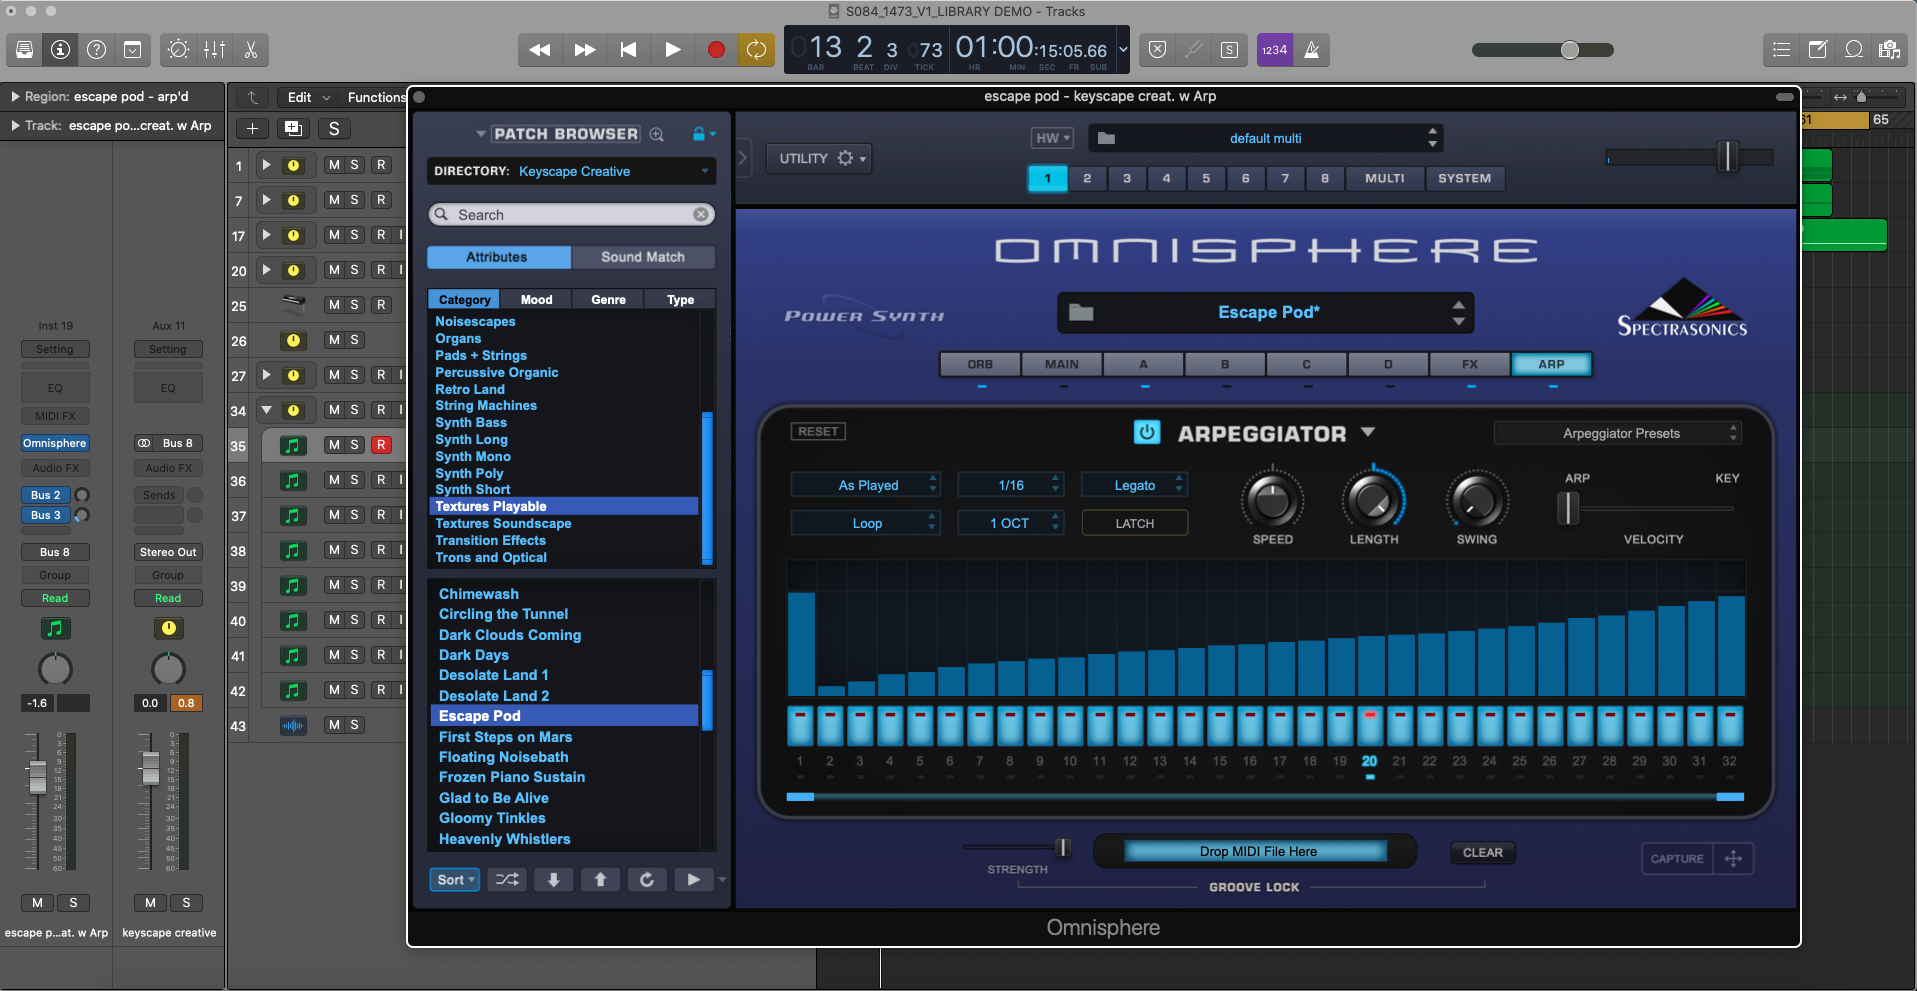
Escape Pod* Preset with Sforzando/Crescendo Arpeggiator. One of my favorite ways to take a simple patch in Omnisphere and create a unique transition effect.
Felt But Not Heard
Creating a colorful “pad-based” foundation to help fill up the noise floor of your track can be extremely helpful, particularly with this type of orchestral track. While sparsity can of course have its moments, as a general advertising rule, filling out sonic space is usually the way to go. The “pads” section of Omnisphere or Keyscape Creative can offer an unbelievable array of tools to help make an orchestral piece such as this example feel less “dry” and more “cinematic”. I love using a simple sine or warm-sub bass from Trillian to fill out the low-end of a piece, particularly because of the way that so many of their patches offer a variety of tones that feel expansive yet simple. My process as it relates to this idea is typically: find a melody, build a structure with a simple piano or string patch, starting producing the more nitty-gritty elements and *then* add these more cerebral elements.
The “pads” section of Omnisphere or Keyscape Creative can offer an unbelievable array of tools to help make an orchestral piece such as this example feel less “dry” and more “cinematic”.
Zoom Out
This final step is the one most-often skipped but I’d argue is the most valuable. Start by consolidating your tracks into subs or groups (depending on your DAW, I was a long-time Pro Tools user but I’ve switched to Logic recently and discovered the wonder of its summing capabilities). Once you’ve distilled your tracks into 8-10 groups (i.e., drums, bass, synths, percussion, etc.,), start moving the video file a few frames forward and back. Hit play. Did something about the way your track interacts with the picture change? Did the crescendo hit at a more exciting moment? This small trick has clicked with me more times than I care to admit. After four to five hours in the trenches of a thirty second commercial, it’s easy to lose the 30,000ft view. Take a hacksaw to your idea by simply moving the video file around until an alternate (and possibly better) version of your idea comes to life. My other favorite part of “zooming out” is that you can also make last minute additions to the track if you feel as though something’s missing. It’s usually at this point, juuuust before mastering, that I open up Keyscape one last time to add in a few more colorful elements. Refer back to step three and use a few more transition effects to accentuate your (somewhat) new creation!
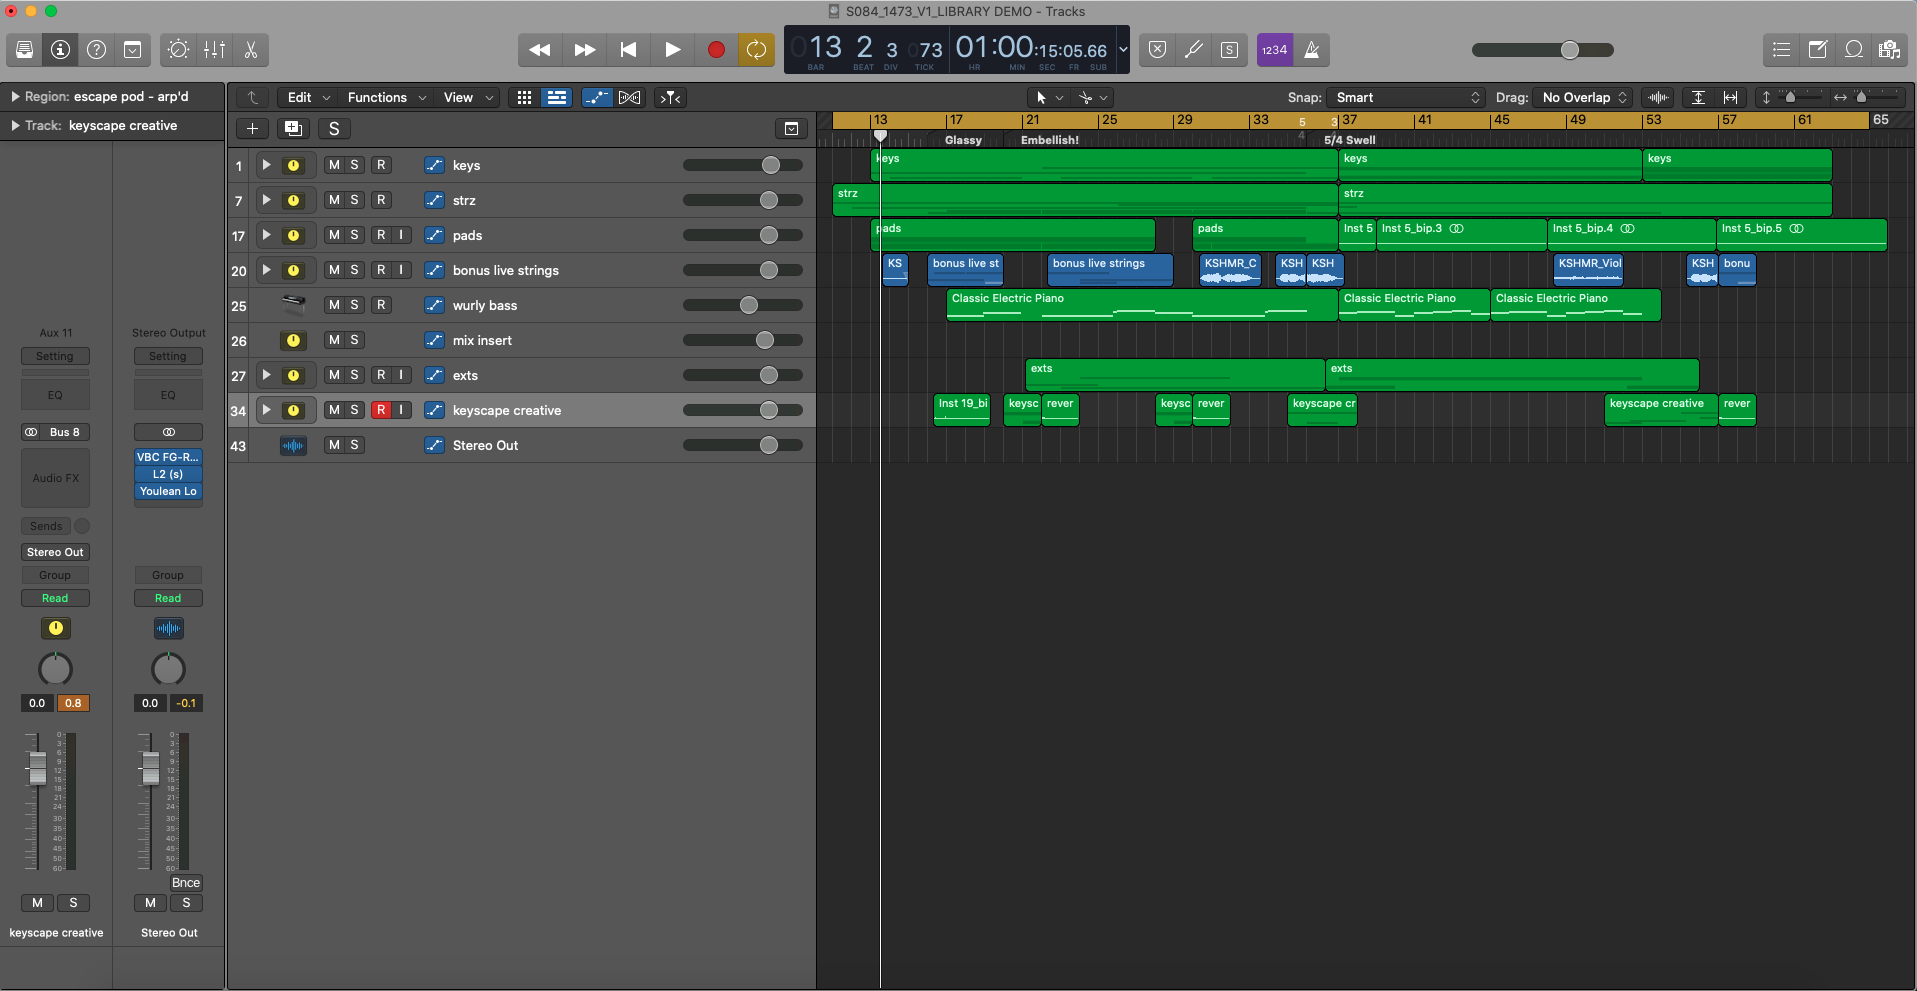
A view of the subfolders I create to keep a relatively dense session feeling compact. I find this can help keep perspective when I’ve gotten stuck in production-induced quicksand.
Alternate Arrangements (Bonus Tip!)
Creating alternate arrangements may seem like an added burden when timelines are already tight. However, you may thank yourself later. If you’re working on a :30 piece that only manages to have a simple “intro, verse, chorus” type of arrangement, build out a bridge and turn it into a :60. I can’t tell you how many times over the years I’ve had tracks licensed that required extending out a track from a :30 or even a :15 into a :60 or :90. And vice versa, if you’ve made a :60, turn it into a :30 and utilize some of the transition effects you’ve created with Omnisphere to piece together a condensed version of your piece. Your tracks, whether chosen by a client or not, hold incredible value and are sure to have a life in the future that you may have never expected. Give them the best shot of getting licensed by creating these alternate arrangements.
Credits:
Max Schad
Creative Director and Composer at Butter Music & Sound
Spectrasonics products are proudly distributed in the Americas by ILIO.