Discover Omnisphere's Hidden Sound Design Shortcut
By now, Spectrasonics Omnisphere needs no introduction. Being one of the most popular soft synths in the world, it's an essential part of any musician's toolkit—from bedroom producers to Grammy-winning professionals. And while no other synth comes with a whopping 14,000 patches out of the box, that’s not enough to keep some producers from worrying about sounding like the next Omnisphere user. If you don’t want to spend days making your own patches, how can you use Omnisphere and still sound original?
Luckily, the good folks at Spectrasonics had this in mind when developing Omnisphere, and included a brilliant feature that makes it remarkably easy to come up with new and unique patches. And get this—you don't need to know a thing about sound design to use it!
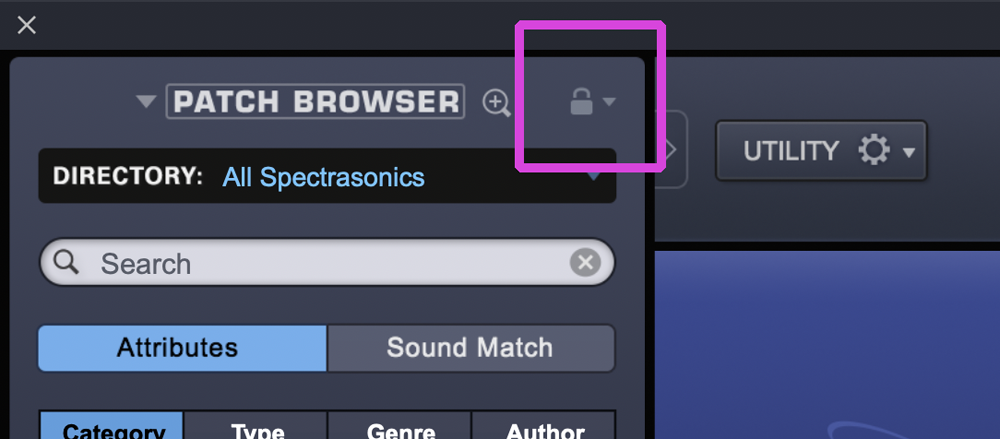
What is SOUND LOCK?
Sound Lock is a simple feature that allows you to keep specific parameters of a patch and apply those same parameters to new patches. For example, let's say you like the FX section, Arpeggiator pattern, and the Modulation Matrix of a certain patch. Using Sound Lock, you can freeze all three and apply them to new sounds as you select them in the Patch Browser, all but guaranteeing you'll end up with an original sound with every click.
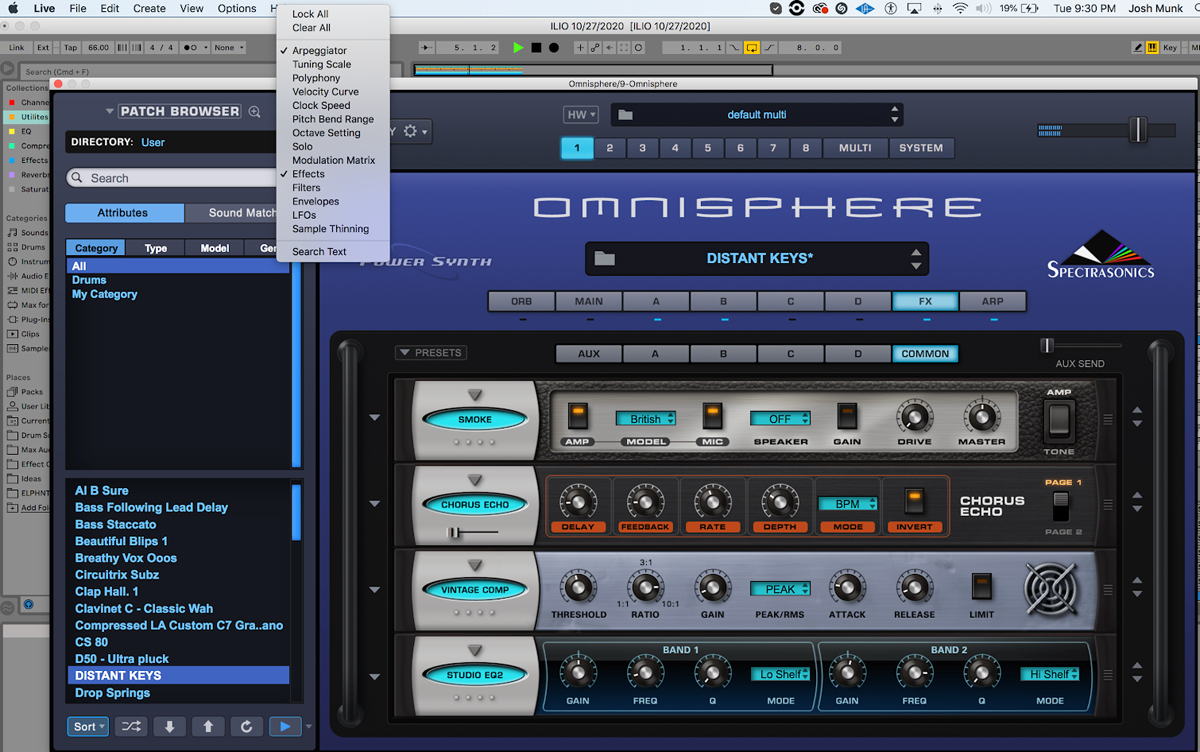
How do you use it? Simple. Click the “lock button” near the preset browser to view all lockable parameters. Choose one and try it out! When you find a patch you like, you can lock any of these parameters: Arpeggiator, Tuning Scale, Polyphony, Velocity Curve, Clock Speed, Pitch Bend Range, Octave Setting, Solo Mode, Modulation Matrix, Effects, Filters, Envelopes, LFOs, and Sample Thinning settings. Then as you browse through other patches, those parameter settings will be applied to the new patches.
Sound Lock is a perfect way to break that creativity rut, speed up your workflow, and comes in handy during many different stages of production. Let's look at a few scenarios where I find it extremely useful:
1. Keep an Arpeggiator Pattern or that “Perfect” FX Chain
Following up on the previously mentioned example, Sound Lock is an excellent way to home in on an inspiring, yet unique sound in the early stages of a production. When I'm staring at an empty session without a particular idea in mind, I try to go browse through presets with no judgment of any kind, keeping my ears open for interesting textures and tones. When I find something that grabs my attention, many times I'll like one part of a sound but find that the overall patch isn't working for me. Sound Lock lets me keep the part that I like, for example, the arpeggiator pattern, and continue browsing presets using that same pattern until I find a sound that better fits the vibe. Using this method, I'm able to avoid that feeling of “It's good, but not exactly what I want”. After three or four items are locked in, that FOMO becomes a distant memory.
Once you lock in your chosen parameters, every new sound you audition will now automatically include your locked in parameters while you browse. For example, in the photo below I locked in the arpeggiator and effects on a lead type patch and began scrolling through presets. Now each new preset replays the arpeggiated pattern and the effects that I locked in previously. Try it for yourself to see how much time this saves, especially at a point in the production process when you really don't want to waste creative juices.
2. Shaking Things Up With The Orb
As a producer, one of the rules I've made for myself over the past few years is when something is not working, shake it up immediately! I think we all know the feeling of trying to massage brilliance out of a sound when it is desperately asking to be thrown out instead. When I'm not feeling the vibe of a track, nine times out of ten, it's due to either wrong drum sounds or the wrong instruments being used. When I start to feel the latter way, I'll completely flip all of the Omnisphere instruments on their heads by using The Orb, and “shaking the dice” to see what comes out of it. Once a sound is completely unrecognizable, I'll take it a step further and “lock all” (see below). Next, I'll start browsing patches with these new randomized settings in The Orb, and very soon thereafter stumble upon something inspiring.
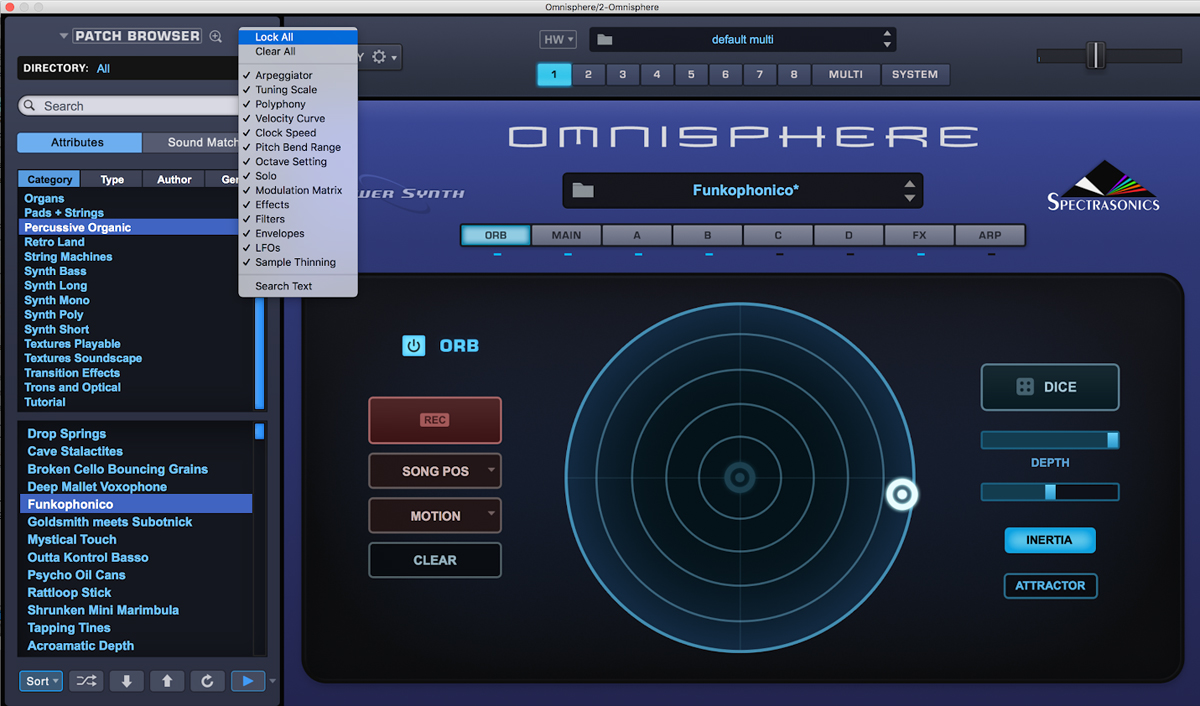
This isn't only useful as a last-ditch effort to spark creativity—it's also an excellent way to keep yourself from falling into “sonic ruts”. Personally, I gravitate towards certain synth sounds and instruments that I feel comfortable using and get good results from. However, when I start choosing the same familiar sounds over and over again, I tend to also play the same familiar chords, baselines, and melodies. To avoid falling into patterns like this, I'll regularly force myself to use sounds that don't sound immediately familiar. The Orb and Sound Lock combination is the best way I know to get it done.
3. Build Modulation Templates - Sound Lock Them
Truthfully, I do not enjoy spending the time to fine-tune parameters, and Sound Lock helps me with that too. Once I've dialed in an interesting pitch bend or modulation setting, I will save it to be used as a template in the future when I might want something similar, but don't want to go through the same arduous process of tweaking those same parameters again.
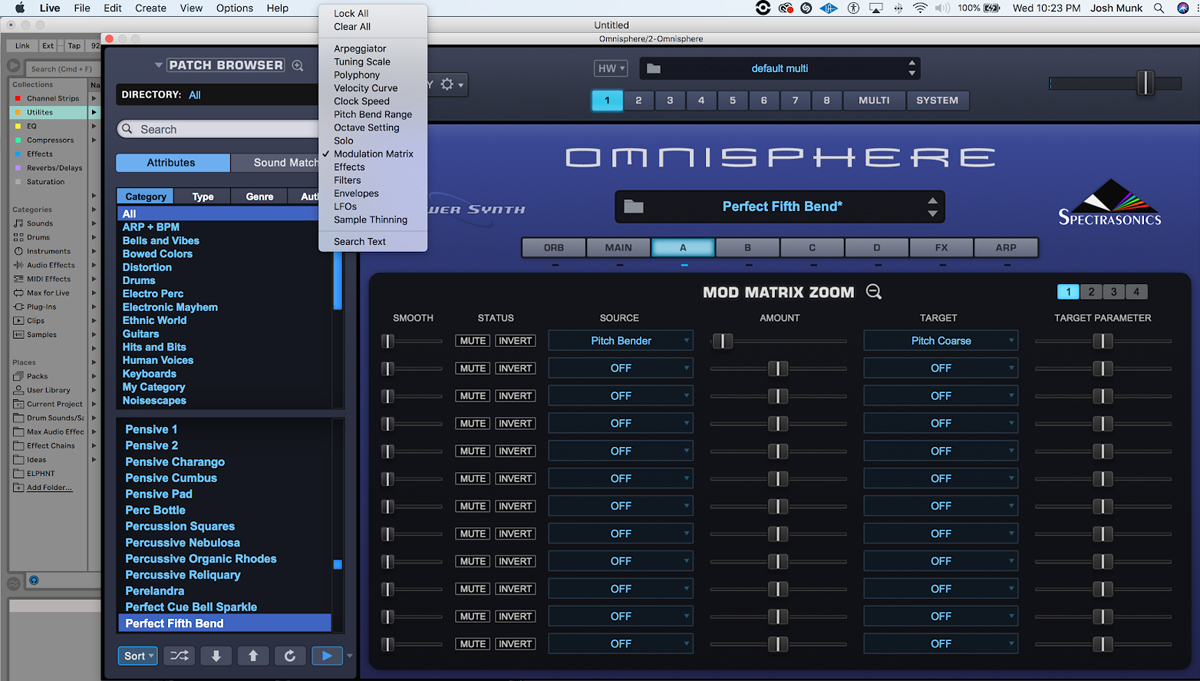
Pictured above is the pitch bender modulated to a perfect fifth that I want to use on just one of Omnisphere's layers (rather than globally). I tend to play bends by hand, as opposed to automating them with a mouse. This adds a looser, more human element to a track when it's called for, and gets me out of my comfort zone musically. To avoid having to fine-tune parameters and make this specific pitch bend again, I'll save it as a preset into my own utilities folder and use it with Sound Lock when building a new instrument later on. Imagine the time saved when you're using a very complex modulation routing! Just save it as a preset once, load it, and Sound Lock it in!
If you've yet to use Omnisphere's Sound Lock feature, try it out! It's up to us as producers to stay creative and this is one feature in Omnisphere that can put that creativity on hyper-drive. I hope Sound Lock inspires a new expedition into your Omnisphere experience, and aids your productions in exciting ways moving forward. If you have your own tips for using Sound Lock we'd love to hear them!
Sound Lock is only one of the hidden gems inside of Omnisphere, so keep an eye out for more tips and tricks coming soon!