Bass guitars are an interesting thing. So many great records over the years have been using nothing but a single DI track (plugging the bass guitar directly into the console, preamp or interface) and capturing the raw sound. Sometimes this is exactly what the track needs, but other times, it calls for much more. So what do we do when we don’t have thousands of pounds of expensive bass amps, preamps and the like?
Amp simulators are becoming increasingly powerful and convincing—and TH-U from Overloud provides an awesome array of great-sounding bass amp sims—but sometimes, we need a bit more than just a quality amp simulator to achieve a controlled, deep, and exciting bass tone.
In this article, I’m going to share with you a technique for achieving exactly that and talk you through how I set up my bass guitar tracks and get killer bass tones every single time I mix using nothing but a single DI’d bass guitar recording.
What is Multing?
Multing is the process of taking a single recorded track (in this case a DI’d bass guitar) and copying it across several different tracks. Each of these copies is processed differently to achieve a cohesive tone when brought together. In the context of a bass guitar, this helps particularly in controlling the low end whilst keeping the mid-range exciting and dynamic, helping it to translate to all kinds of listening devices.
Typically I set this up using five tracks, each with a copy of the original bass DI, and it goes something like this:
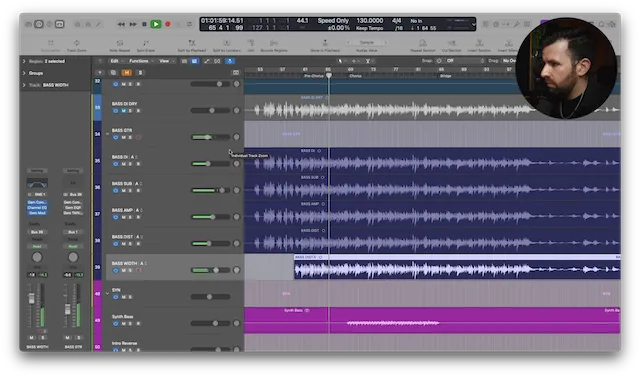
- Bass DI - the original DI’d bass signal
- Bass Sub - nothing but the low frequencies of the bass guitar
- Bass Amp - the DI’d track running through a bass amp simulator
- Bass Dist - the DI’d track running through a saturation plugin
- Bass Width - the DI’d track running through a modulation plugin
All of these tracks are then running to a bus with a bit of finalization on. I’ll explain this all in more detail below.
Bass DI
Firstly I start by processing the original DI’d bass guitar. This will be used to help make the bassline more intelligible and bring some detail to the sound. My goal is for this track to be tight and controlled dynamic-wise but still allowing the details of the transients to cut through in the mix. A fast-acting 1176-style compressor is my go-to here and the Gem Comp 76 works great to keep the dynamics pinned down but still allow the detail of the bass guitar to cut through. A super-fast release and medium-to-fast attack usually does the job.
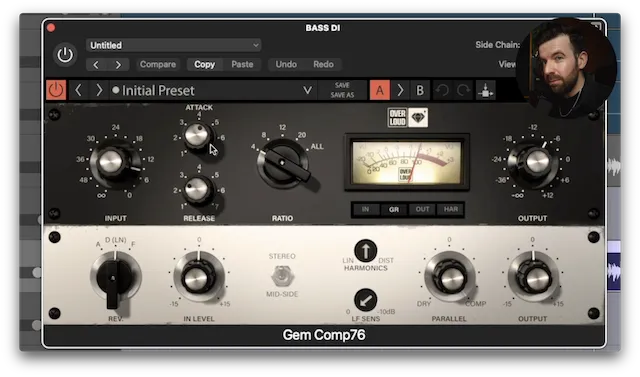
Once I have the dynamics pinned down, I like to high pass everything up to 150Hz to remove all the deep low end from the DI track. No low end in a bass guitar? Sounds weird, but I’ll explain more shortly.
Bass Sub
The next step in this process is to create a fresh track called ‘Bass Sub’ and copy the DI track onto this new, blank track. The purpose of this track is going to be to control the low end of the overall bass guitar sound. On this track I’m going to do the inverse of what I did to the track above. Low pass everything up to 150Hz and remove everything except the deep lows.
Now I have a single track totally dedicated to manipulating the low end. Sure, I could use a multiband compressor on the whole bass sound but this way I have more control and can use a different flavour of compression to get the exact result I want.
For the low end, I prefer a slower, opto-style compressor such as the Gem Comp LA. Faster, FET compression can squash the life out of the low end and add in unwanted saturation and distortion. A slower, smoother compressor allows those deeper frequencies room to breathe whilst still controlling the dynamics.
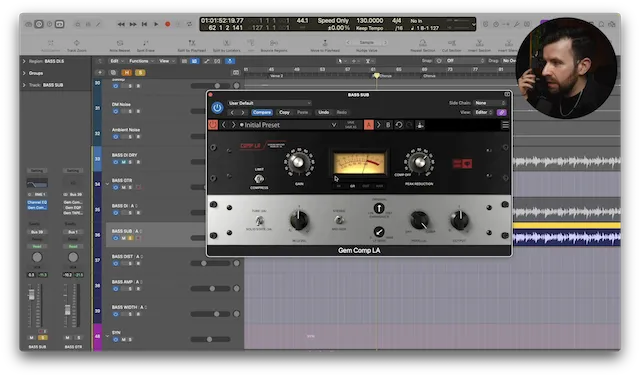
Using the Gem Comp LA, either in the 2a or 3a modes, depending on what suits you best, can iron out any dynamic inconsistencies in the low end without squashing it too hard. I’ll now blend this track back in with the DI track above and dial in the amount of low end to taste.
Note that this ‘bass sub’ track will be the only track with frequencies below 150Hz. If we don’t high pass all the other copies of the bass guitar, we’re going to end up with a build up of uncontrolled lows which ultimately defeats the point.
Bass Amp
Now I like to make another copy of the original DI’d bass guitar and insert a bass amp simulator of your choosing. My preference is to use Overloud's TH-U and I particularly like the sound of the TH-U Made In Rock – JUP 320. The purpose of this ‘amp’ track is to provide the meat of the tone and move it away from just sounding like a dry DI track.
As a sucker for 1970’s bass tones, this amp sim does an incredible job of recreating a 70’s classic and gives us an enormous flexibility with both a parametric and graphic EQ, along with the ability to switch between different cab and mic combinations.
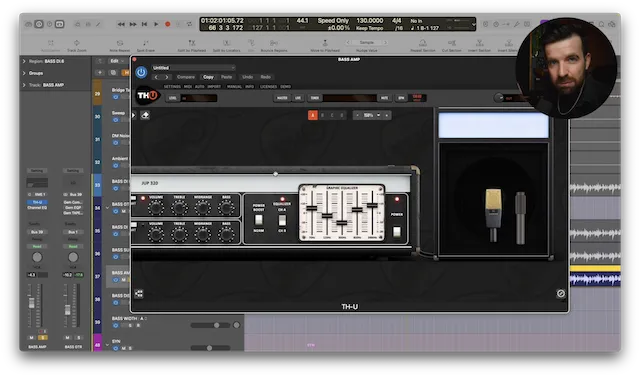
I have a tendency to lean towards bass amp tones that have a very scooped mid-range and a top-end boost. This gives a very different sound to the original DI track which is typically more mid-range heavy, so blending the two together means there’s now a whole range of different tonal possibilities. Again, high pass everything from 150Hz upwards, leaving the low end to the ‘bass sub’ track.
Now is a good time to get the balance of these three tracks right. I like to use the ‘bass amp’ track as the foundation for the tone, blending the ‘bass sub’ in underneath for just the right amount of low end. From here we can bring in some of the aggressively-compressed DI signal to bring out more details in the notes of the bass line.
Bass Saturation
The next move is to add some saturation and distortion to bring it forward and pop through the mix on smaller speakers. Again, this is done on a fresh track and called ‘Bass Dist’, using another copy of the original DI’d bass signal.
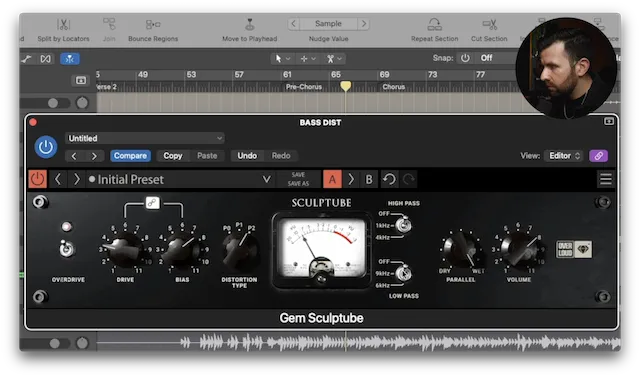
I like to start by hitting this pretty hard with some fast compression in order to pin the dynamics in place and make sure that any saturation is consistent and not overly affected by jumping peaks in the performance. Another instance of the Gem Comp 76 with relatively fast attack and release settings should do the trick.
From here we’re going to need a great sounding saturation plugin. I love Sculptube for this job. This plugin emulates tube-style saturation and is super versatile, capable of everything from a light sprinkle of drive to fully cooked, bone shaking distortion. The amount of drive you choose is entirely dependent on the song but a healthy dose of tube saturation is a nice place to start.
This is where the multing technique is so useful—if I were to add saturation to just a singular bass track, the overdrive would swallow the low end the more it was pushed. Isolating and controlling the low end separately means we can preserve the depth of the bass and still push the midrange into exciting saturation.
I will high-pass it at 150Hz again and blend it back in with the other existing copies of the bass guitar. In most cases, I won’t need much—just a subtle amount of the ‘bass dist’ track should be enough to help it cut through a busy mix and allow the bass to still pop on smaller speakers.
Bass Width
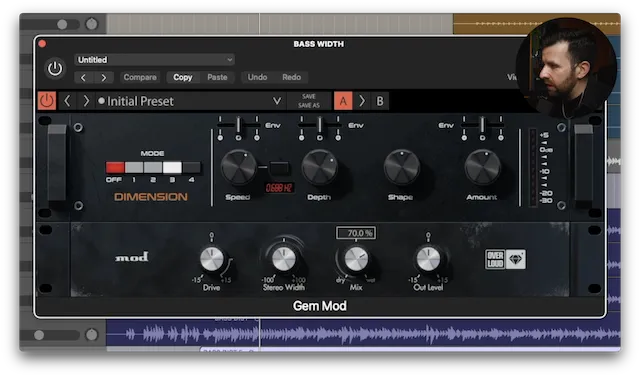
The final track I like to add is to bring some width and dimension to the bass. The width is designed to be felt more than heard, and to give the listener the illusion that the bass is big and filling the speakers.
Once again, I’ll do this on a fresh track with another copy of the original bass recording and, as before, apply some compression and EQ to the part—high-passing everything above 150Hz again.
From here, my plugin of choice is the Gem Modula, a faithful recreation of an 80’s classic hardware modulation unit. This is great for adding some characterful width that isn't overly intrusive or phasey. This time the 150Hz high pass filter is extra crucial as ideally we want to keep the low frequencies of a mix in mono, so ensuring there’s no low end in this ‘width’ track is going to keep the bass focused and centred in the mix.
Much like the ‘bass dist’ track, only a touch of this is needed to enhance the feeling of the bass. Sometimes I’ll even automate this track so it’s only there for certain sections of a song, e.g., the chorus where the mix needs to feel larger and wider.
The Bass Bus
The last part of the process is to route these five tracks to a singular stereo bus. Not only does this allow control of the level of all the bass guitar tracks at once, but it also means some additional processing and finalization can be added to bring the bass guitar together and make it even more cohesive.
Typically I like a touch of subtle compression, some overall EQ, and lastly a dash of tape saturation to round off any stray transients and extend the depth of the low end.
For the compression, I’m typically using the Gem Comp LA in the 2a mode. I’ve already controlled most of the problematic dynamics on the individual tracks by this point so this compressor is just there to glue the parts together a bit more.
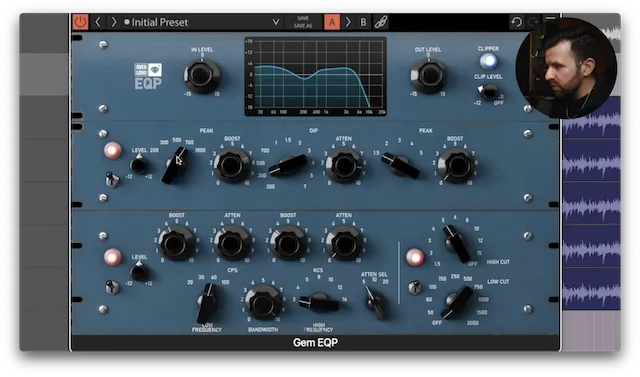
This is generally followed by a broad-strokes EQ such as the Gem EQP. The low end boost and attenuation of a pultec-style EQ works wonders on bass guitar, and this particular plugin has some awesome additional features such as the mid range EQ which is perfect for giving a little extra push to the mid frequencies to help the bass guitar shine. The filter section also sounds amazing and can be just the thing for tidying up each end of the spectrum.
Lastly, all of the above is running through the Gem Tapedesk. This plugin is one of my all-time favourite tape saturation plugins. I love the way it helps deepen the low end and shaves off any unwanted spikes that may be caused by over-exuberant guitar picks on strings or any other particularly sharp transients.
Tapedesk is magic for adding the finishing touch to a bass guitar and giving us a deep, warm, rich tone.
Final Thoughts
This whole setup can (and should!) be saved in your mix template to speed the whole process up. This way, every time you mix you can just copy your DI signal to all 5 tracks, balance them to taste and you should be 90% of the way to a great bass guitar tone.
I use this technique on a whole range of music and I can almost guarantee it’ll give you great results, whatever genre you’re working in.
As I said at the top, sometimes a single DI bass track is the sound. Sometimes you need more, and this technique will always give you more.
Written by Guy Britton
Guy Britton is a seasoned music producer, mixer, and mastering engineer from the UK, with a focus on pop and indie genres. Guy has helped independent artists achieve breakthrough success, with his work being featured on radio and TV in the UK and Europe, as well as major Spotify editorial playlists. His expertise lies in delivering a unique and commercially appealing sound, with a passion for combining modern and retro elements to create deep, exciting tracks.