What is a Vocal Chain?
The term “vocal chain" has become increasingly common among audio engineers and producers in recent years. Instagram is seemingly flooded with accounts posting “must have" plugins for vocal processing along with incredibly complex signal paths claiming to give you the best ever vocal sound. But what does it all actually mean?
Simply put, a vocal chain is just a series of signal processors designed to give you consistently great results. There may be times where filling up every possible plugin slot on your channel strip is necessary but in my opinion, simplicity is often the best way to achieve a great mix.
Maintaining Control
Ultimately, my goal when mixing a vocal is to take complete control of the singer’s voice. This means controlling the dynamics, controlling the tone, and controlling the placement within the entire mix relative to all the other instruments.
Every vocalist is different and every song presents a unique set of challenges, but a good vocal chain is one which can be recalled on basically any mix and give great results with minimal effort.
If I had to build a vocal chain from scratch on every mix it would mean spending valuable time and brain power trying to get control of things. Using too many plugins or too many fancy processing tricks means I can often quickly lose control of what the vocal is actually doing, as well as losing sight of which processor is dealing with which area of the vocal sound.
Ultimately, my goal when mixing a vocal is to take complete control of the singer’s voice.
This is why I’ve built a simple vocal chain which follows some basic principles that work on nearly every mix. This chain lives in my mix template and requires minimal tweaking from song to song.
Here is my basic set of principles to building a great vocal chain:
Correction First
The first thing we need to do is identify and correct the problem areas in the vocal. Assuming any performance and pitch issues have already been ironed out in the editing process, the first issues that present themselves at the mixing stage tend to be tonal problems and dynamic inconsistencies. For this reason, the first plug-in in my chain is always some kind of parametric EQ, which allows me to cut any problematic frequencies with precision.
Common problem areas in a vocal usually present themselves as low-end ambient rumble which can be removed with a simple high-pass filter; low-mid “boxiness" either from the singer’s voice or the placement of the microphone in the room; upper-mid harshness and “nasal" sounding vocals; and finally usually one of either an overly bright vocal sound that can be smoothed off with a gentle high-shelf cut, or a dull and dark sounding vocal, which can be given a bit of life using a gentle high-shelf boost. The stock EQ in nearly all modern DAWs will do the job here.
The first issues that present themselves at the mixing stage tend to be tonal problems and dynamic inconsistencies.
The age-old question amongst inexperienced engineers is whether to EQ before or after compression. The answer to that is never quite that straightforward, but the simplest answer I can give is: do both.
Corrective EQ should happen before any compression takes place. We can then use a second, more “colourful" EQ later on in the chain to enhance the tone of the vocal and smooth out any artefacts that have been generated by the compression.
Corrective EQ at the start of the chain is crucial because it removes unwanted frequencies that will affect all the other processing later on. For example, if we don’t remove low-end rumble in a vocal take that low-end frequency information will affect the compressor in the vocal chain. Even if the rumble is too low to be audible to our ears, that energy is still feeding into the compressor and causing the compressor to react accordingly.
Smooth out the vocal and ensure there is nothing which shouldn’t be there before you start adding anything else.
Dynamic Control
Once we have the basic tone of the vocal correct, we can now begin dealing with any dynamic issues. Typically, I like to use two stages of compression: one to tame any extreme peaks and jumping transients, and a second to smooth the tail ends of the vocal phrases and lock the singer in place in the mix. These two stages of compression give you more control over the tone and it also prevents either of the compressors from working too hard. Over-compression is going to give you a flat, lifeless and unnatural tone, which we want to avoid at all costs.
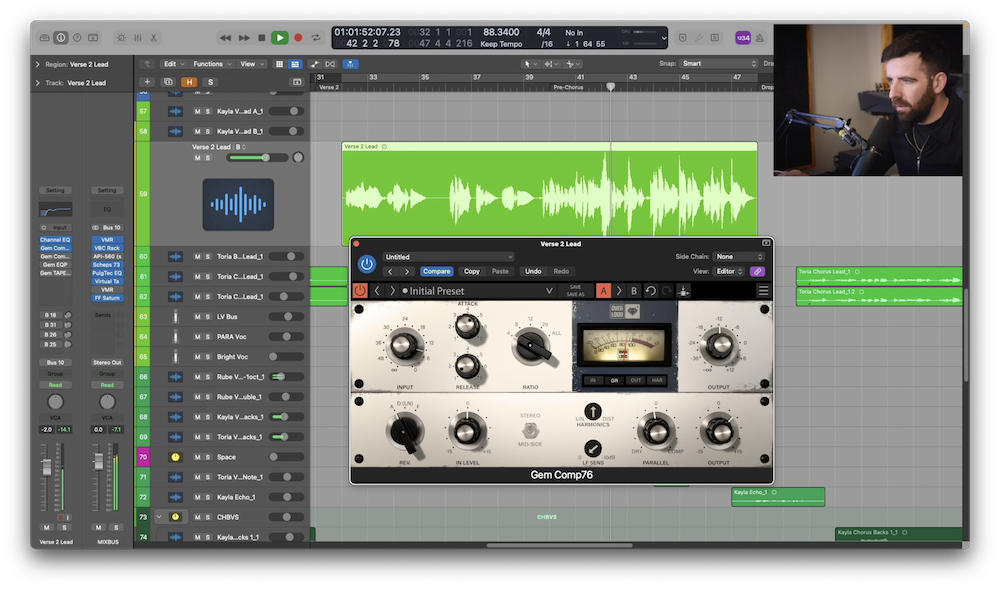
To catch those runaway transients, I like to use a fast-acting compressor such as the Gem Comp76. FET style compressors such as these are often associated with aggressive, forward-sounding vocals but they are capable of so much more than just aggression. Setting the Comp76 with a 4:1 ratio and the fastest possible release means that the compressor is going to become super responsive and ready to react immediately to any peaks that pass its fixed threshold.
From here it’s down to taste—the faster we set the attack time, the more the compressor is going to grab the transients in a vocal; the slower we set it, the more forgiving it will be to the dynamic of the performance. Use your ears and play around with the input gain and the attack time to find the sweet spot where the peaks are being controlled but the vocal still sounds natural and not too squashed.
This fast-acting compression is great for bringing the vocal closer to the listener and taming the transients, but due to the quick release setting you may find there are still some inconsistencies in the dynamics—particularly on any longer, more sustained notes. This is where a second stage of compression comes in handy. A slower-acting compressor, such as the Gem Comp LA, can act as the perfect partner to the Comp76. You don’t need a ton of compression here—just lightly moving the needle on the Gem Comp LA will be enough to hear it holding onto those sustained notes and helping to iron out any remaining dips and peaks in the vocal.
A slower-acting compressor, such as the Gem Comp LA, can act as the perfect partner to the Comp76.

Tone Shaping
Now that we’ve fixed the initial issues in our recording, we should be starting to work with something which sounds much more like a finished vocal. This is where we can begin to get more creative and shape the tone to set it in the track however we see fit. To do this tone shaping, I almost always call on an EQ such as the Gem EQP. This incredible plugin is a faithful recreation of the classic Pultec EQs used on so many great records, and it’s perfect for adding that finishing touch to polish up a vocal performance.
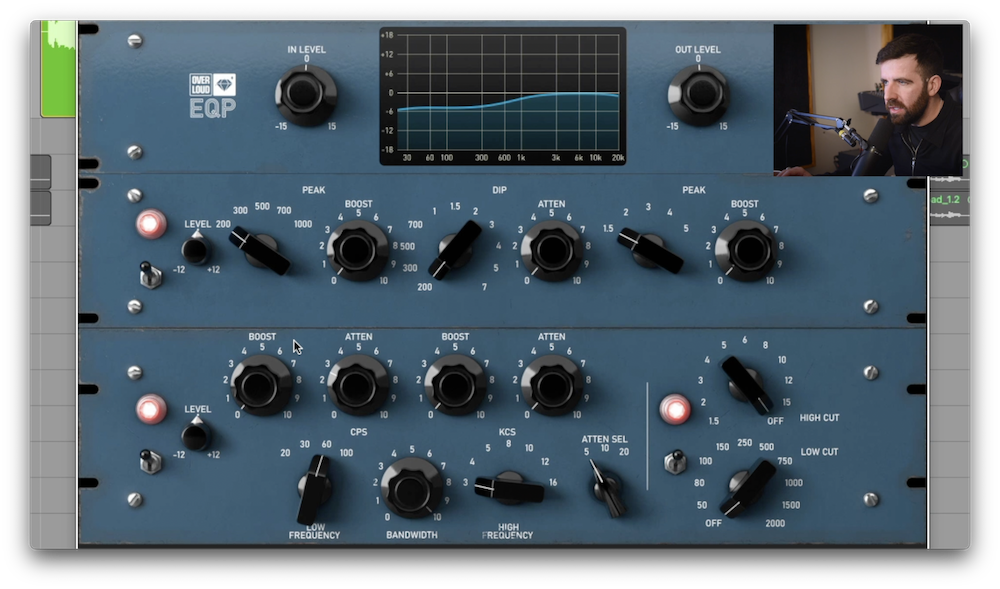
My starting point is usually to roll off some low end using the low attenuation and then to boost some high end using a broad bandwidth. This helps to clean up the lower frequencies in a super “musical" way which sounds much more natural than rolling off with a standard parametric EQ. The top end boost also opens the vocal up, adding a shine to the performance which will help lift it above the mix, bringing clarity and definition to the vocal.
To do this tone shaping, I almost always call on an EQ such as the Gem EQP.
Then lastly, if necessary, we can use the mid-range EQ section to dip out any remaining harshness or muddiness which may have been amplified by the compression, or alternatively boost any mid-range “dead spots" which may be causing the vocal to get lost in the mix. Usually just some small touches here and there are enough to make the mix come to life.
Finalizing
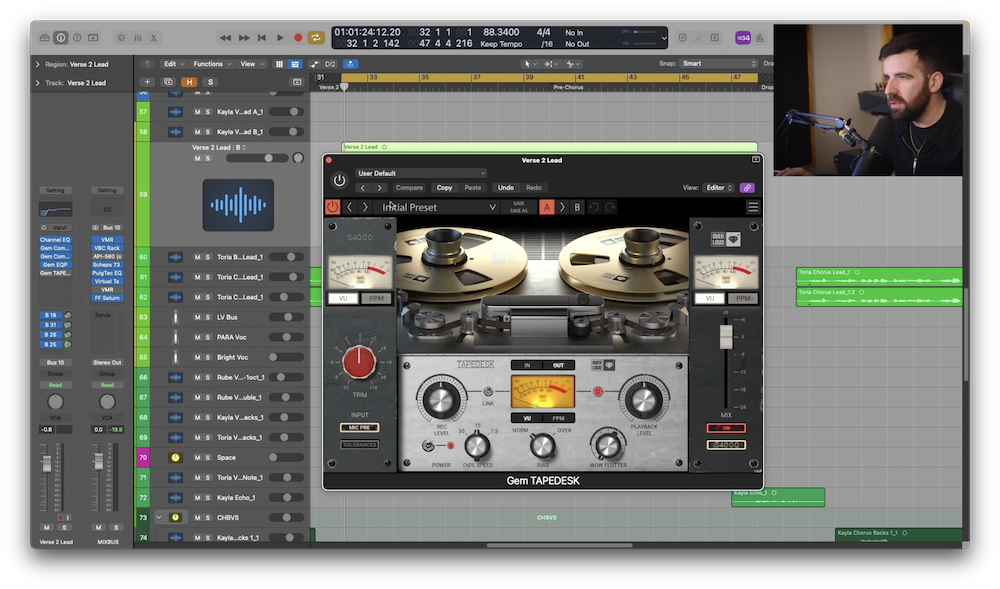
The very final stage for me is to add a light sprinkling of tape saturation. This helps to smooth off any top end harshness, particularly in the form of unwanted sibilance or “airyness", as well as applying some subtle tape compression and colouration which helps to warm the vocal up. One of my all-time favourite tape saturation plugins is the Gem Tapedesk and this is my go-to for this particular task.
Adding this plugin at the end of the vocal chain gives us much more control. Many people will say that tape saturation and console emulation plugins should come first in the chain if you want to be faithful to the signal paths they are recreating. Whilst this is strictly true, inserting a saturation plug-in before any compression has taken place means that the louder peaks of the vocal will saturate or distort before the quieter parts, giving you a much more uneven saturation sound and consequently less control. As such, I like to insert the Gem Tapedesk at the end of the chain for a more consistent and controlled level of colouration.
I like to insert the Gem Tapedesk at the end of the chain for a more consistent and controlled level of colouration.
Within the plugin we have a nice range of options to affect the sound. Switching between the different tape speeds (30ips, 15ips, or 7.5ips) will give you different tonal results, with 7.5ips providing a darker and thicker sound, 30ips providing a sound which is more forgiving in the high frequencies, and 15ips being somewhere in between the two.
Engaging the console emulation section and choosing one of the S4000, N80 or T88 models will also give you different types of colouration, offering up a wide range of additional shaping with just a few switches.
This is all down to taste—use your ears to pick the settings which best suit the song you are mixing and once you’ve got the Tapedesk dialed in just right, your vocal should now be sitting perfectly in the mix!
Written by Guy Britton
Guy Britton is a seasoned music producer, mixer, and mastering engineer from the UK, with a focus on pop and indie genres. Guy has helped independent artists achieve breakthrough success, with his work being featured on radio and TV in the UK and Europe, as well as major Spotify editorial playlists. His expertise lies in delivering a unique and commercially appealing sound, with a passion for combining modern and retro elements to create deep, exciting tracks.